Hunting for Something?

Sunday, September 29, 2019

3 Ways to Thoroughly Screw Up a Pork Shoulder


This is what a pork shoulder should look like. Crisp bark on the outside. Pink smoke ring underneath. The meat beneath is tender but, like good pasta, still has some bite.

Our claws digging into it is a nice touch.

Pork shoulder overall is a forgiving peace of meat. Take some time with it and you'll get good results. It's not rocket science. We spent a month in 2017 studying the Boston Butt. This isn't a soufflé. Anyone with a smoker or an oven, some basic seasonings and some patience can make good pulled pork.

But as soon as you think you're good at it and slip up, you can screw this up.

Here's how I did it.


That's what a pork shoulder should sound like. The crackling of the crust. The wet, sloppy tearing of meat. Glee and giggling. 

I've done a number of  shoulders and I started to believe I was good at it. I started to think they were easy.

Then this happened:


Kind of an ashy sound at the start. It all came apart too easily. Not enough pull from the pulled pork. But the biggest problem?

Dead silence.

My wife and kids were watching. Normally they are excited at this moment. The prep, the hours, the smells, the anticipation. Typically they are stoked.

This time they were appalled.

So what went wrong?

1 - I Set a Deadline

The worst barbecue question ever is: "Is it done yet?"

You don't cook barbecue for now. You cook it for tomorrow. Like bread or wine, it can't be rushed. It will be done when it is done.

If you're hungry, don't push me. Eat something else.

But my son had a birthday party to get to at 2pm. We had some kids to zap with lasers. We wanted to eat pulled pork before we left. Therefore, I wanted the shoulder to hurry the hell up.

Shoulders don't play that.

2 - I Cooked it Too Fast

If it takes six hours at 300º then it will take two hours at 900º, right?

I didn't push it that hard, but I screwed up.

225º Fahrenheit is the money temperature for barbecue. Under that is fine but too far over is a recipe for disaster.

I'd smoked this shoulder all night, but it still wasn't near my target of 190-200º. I needed to get it hot enough for the connective tissue and fat to melt.

I commonly smoke for flavor then bake for tenderness. I'll finish a shoulder in the oven overnight at 225º because I can easily control the temperature and sleep at the same time.

Plus, the house smells like roasted smoked pork in the morning. Major bonus.

This time I tried 250º, then 275º and eventually 350º to get the meat up to temperature in time for lunch.

The beautiful fat cap on the butt turned bitter and black.

Oops.

3 - I Got Cute with the Rub

I have a basic formula for barbecue rub based on Alton Brown's 8:3:1:1 ratio. I'll change the ingredients based upon what's in the pantry, but this time I tried to get real creative.

What if I could get a toasty crispy element to the rub by working in some corn meal?

Fail.

Corn meal can be roasty and crunchy in the right application, but on top of a pork shoulder it just got mushy. It was the opposite of bark. It was more like a log that had been in a swamp too long.

We'll be keeping cornmeal out of the rub for the remainder of eternity.

A proper rub is a combination of sweet, spicy and salty. I like some seeds in there (coriander, celery, caraway or whatever you got) because they get more expressive when they toast. Essentially, it's the proteins, salts and sugars that form an irresistible crust on your roasted meats.

Save the cornmeal for deep-frying.

And in Conclusion...

Take your time with your meat. Also be patient with your cook. Barbecue will not be done because you want to eat it.

Plus, you can always cook slower, but too fast is the path to doom. Start early. 

Analog charcoal-and-vent smokers are tough to control. In a perfect world, they'd always be at the perfect temperature. But in the real world, you just don't want them too hot. Smokey and too low is better than too hot.

Once scorched, a piece of meat is never going back.

There's nothing wrong with letting ribs or a roast rest wrapped-up at a holding temperature. You can bring chilled barbecue to your friend's party and re-heat it in their oven. It will turn out great.

But try to rush the cooking process and you'll end up with something your dog won't eat.

And cornmeal in a seasoning rub? Hell no.


Friday, January 26, 2018

Chasing Holiday Beef


We don't eat a lot of beef in our family. Nothing against cows, but we're pork, chicken and seafood people mostly.

And for some reason Jana wanted Tri-Tip for Christmas. Who am I to blow against the wind, right Paul Simon?

Besides, so many of our Legion of Dragon Knuckle buddies cook a lot of Tri-Tip and do it well. Many of them are South-Westerners and it seems to be a California and Arizona thing.

My parents were in town for the holiday and they recently moved to Arizona, as many retired folks do. They'd asked me for advice on Tri-Tip, although I had no experience with it.

With the help of the DK Community, I was sure I could show them how it was done.

So off to my favorite supermarket a couple days before Christmas to get some supplies. I'd seen Tri-Tip there before, but found none on that day. It must have been summer when I'd seen it previously, because the butcher said it was very seasonal up here in Washington.

Plan B.


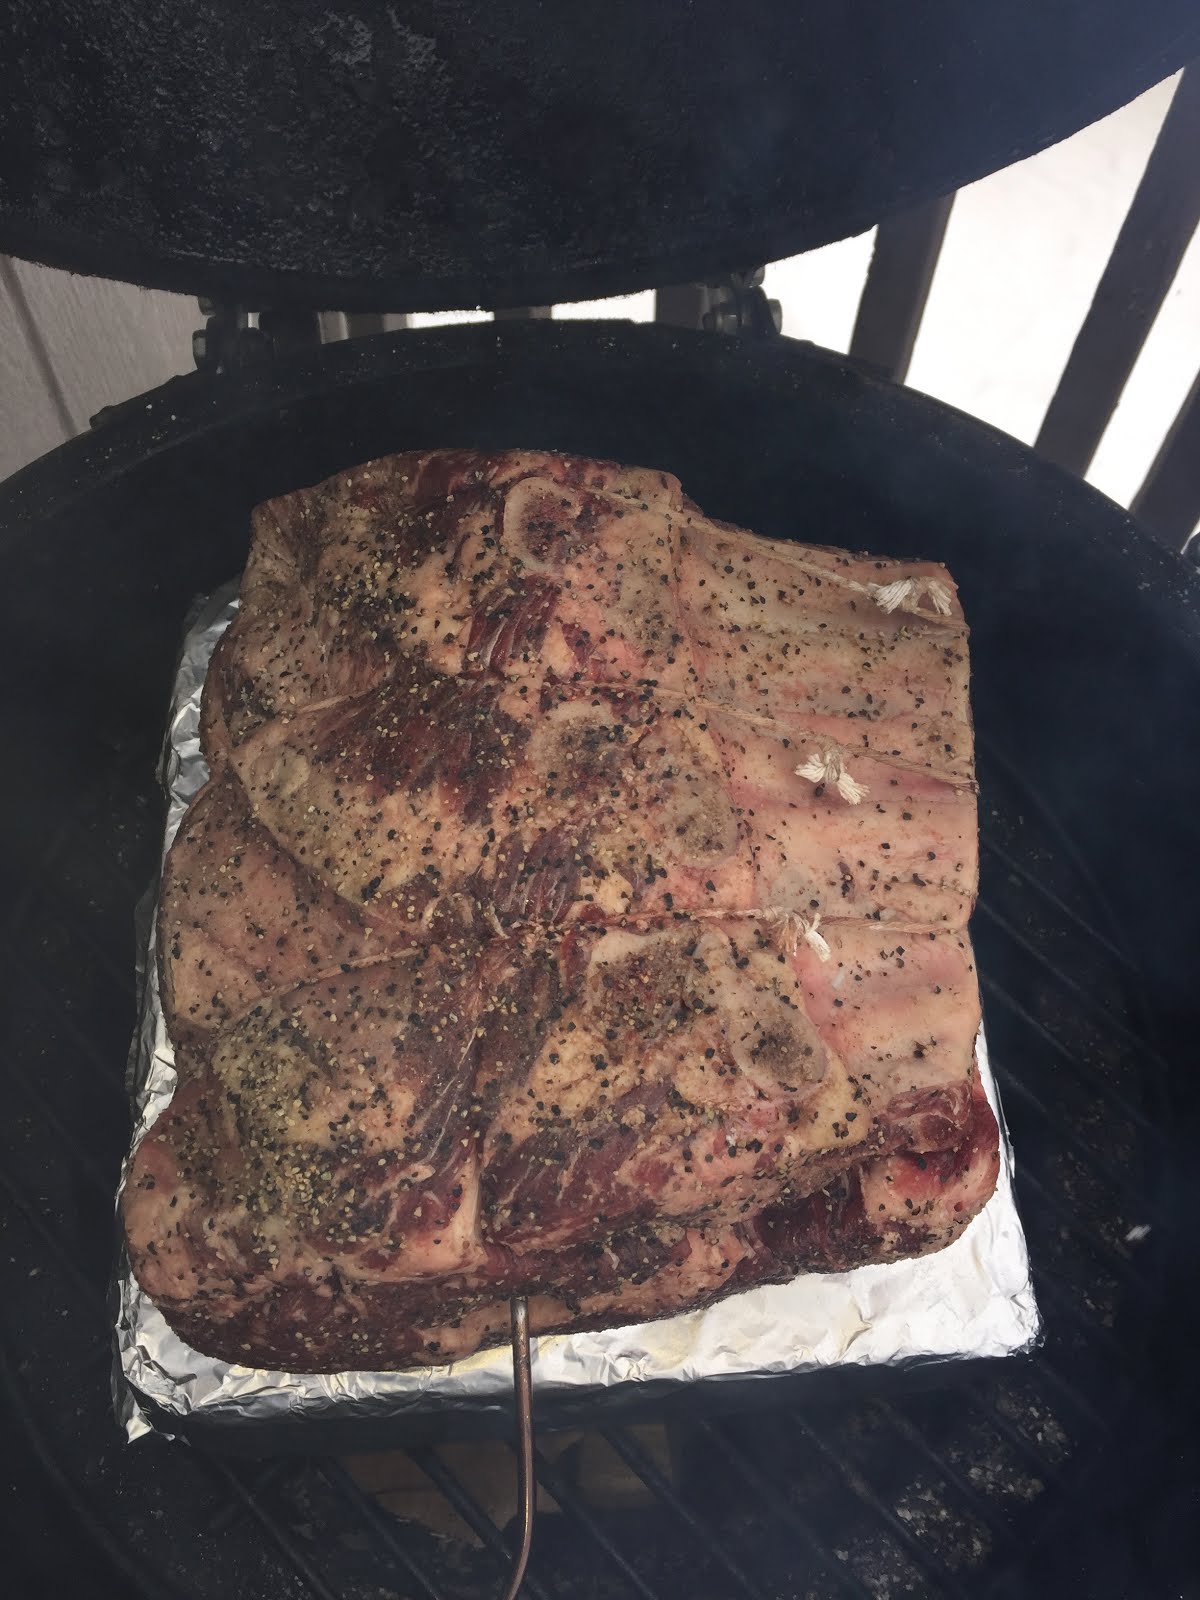
So grabbed an 8 pound bone-in beef rib roast. I made one of these a few Christmases ago and it turned out nice. That one was in the oven, but this one I was going to smoke.

As soon as I had it home, I posted a picture of my new buddy on Instagram and asked for guidance. Marinate? Brine? How should I prep this thing?

Common opinion was that I should season it heavily and wrap in plastic wrap. Now I have my own impossible to acquire (don't ask) rub I use for most things, but I recently got a pack of good stuff from 7 Sins BBQ. 


In the Barbecue and Grilling Community, we share a lot of gifts. Stickers, t-shirts, rubs, sauces, gloves and other gear.

So the most logical seasoning was my new 7 Sins Beef Rub.

After almost two days in the fridge, it was late Christmas morning. All the gifts were open and it was time to get cooking.

I get more excited now about Christmas food than Christmas gifts.

I ran out of charcoal months ago and still use only straight wood in my Big Green Egg, but I'm running low. I sparked a fire with the last of my maple, let it burn down then closed the vents most of the way and let the fire struggle.

Then I wrapped my square patio stone in foil, sprayed it with oil and set it on the grill. I put the meat on the stone, as usual.


I use this trick because with a standard BGE, the fire is right below the meat and will scorch the bottom. With the stone in place, the heat becomes indirect.

I don't know how long things were cooking or truly how hot the barbecue was. I only have a single probe thermometer, which was in the meat.

I should have one of those multi-probe wireless thermometers. Then I could monitor the temp at the upper vent and in the meat at the same time.

Regardless, I cooked it to an internal 130º Fahrenheit, expecting about 10 degrees of carry-over.

My plan was to use the reverse sear technique, which I've never used. I was going to build a campfire, put a grill over it and char the edges.

Yet when I opened the lid it was already barktacular. I wasn't messing with this thing any more. All it needed was a rest, a knife and a fork.


After 20-30 minutes, I went to cut the bones from the roast and found they came off in my hand. I cut one bone off for my dog and saved the rest for soup.

Then it was time to slice.


I'm very pleased with the crust, the doneness and the tenderness. The exterior had a little too much bite from the smoke. Perhaps it was the straight maple.

My resolution for 2018 is to cook with a wider variety of wood. With a little hunting, it's not hard or expensive to find. Here in Washington I should be able to find trimmings from fruit and nut trees. The orchardists my be happy for me to haul them off.

Happy New Year. Your advice is welcome. We're still learning every day.

Friday, November 17, 2017

The New Thanksgiving Tradition: Brown Rice and Bacon Turkey Stuffing

Image via Flickr by Dani and Rob

Some things are just supposed to taste the way Mom made them.

To me, turkey stuffing should be made from cubes of bread, Italian sausage, celery and whatever seasonings Mom always put in hers.

But our first kid has a wheat allergy, so what's a dad to do? Substitute gluten-free bread? Without a gluten structure, the bread would probably reverse-engineer into some kind of rice pudding goo.

Not in our turkey.

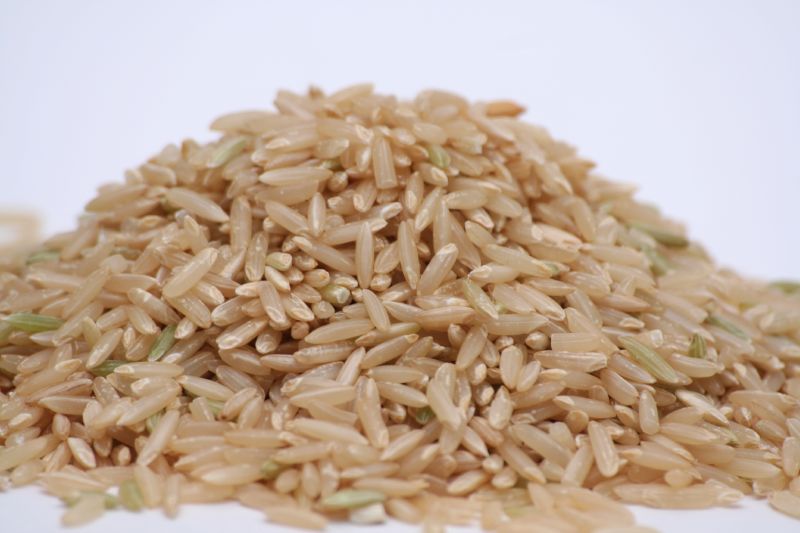
So (sorry Mom) I had to scrap that idea and start from scratch. Why not use a hearty brown rice as a base for stuffing?

And what goes great stuffed in, wrapped around or just plain next to everything? Bacon.

I don't have pictures or video for you right now because I won't be making this until the day before Thanksgiving, but I'll give you the playbook.

1 - In a big sauté pan, add lots of chopped bacon. Of course you cannot make too much. Extra bacon will find its way into the potatoes, vegetables, salad or just into your face. Turn on the heat and render the bacon until crisp.

2 - Remove most of the bacon from the pan and drain off the bacon fat. Leave enough fat in the pan to coat it and leave a cup or so of bacon pieces. Meanwhile, boil some water in an electric kettle.

3 - Add some chopped onion to the hot bacon pan and let that sizzle for a few minutes before adding chopped garlic. Give the garlic a minute or so.

4 - I forget how much rice will fill an average turkey, but again, too much is not a problem. Cooked a second time inside a turkey or not, this stuff is good. Add three or four cups of brown rice to your hot bacon pan. Stir it around to toast and pick up flavor from the pan. Add two cups of boiling water per cup of rice. 

5 - Turn the heat down to low. Add some black pepper and whatever herbs you have, fresh or dried. The bacon may have put enough salt into the environment, so don't add any until you've tasted the finished rice. Let this simmer until almost done. Don't overcook the rice. It's still going to spend some time in a hot turkey, so stop when it still has some bite.

6 - Taste it and add some salt or other seasonings as you like it. Pungent is good here because it will flavor the turkey from the inside. I cook this a day ahead and keep it in the fridge.

7 - When it's turkey time, heat up the stuffing in the microwave if you cooked it ahead of time. It's important to add the stuffing hot. Since you're stuffing it inside a raw turkey, it needs to hit 165ºF to be safe to eat. At the center of the bird, this will take the longest time to hit that temperature. The surrounding poultry will be overcooked by then. So add the stuffing while steaming hot.

Necessity is a mother of an invention. I made this recipe because I had too. Now several Thanksgivings later, this is what turkey stuffing is supposed to taste like around our house.

It's (almost) as good as Mom's.

Friday, November 3, 2017

How to Stuff Pork Right and Wrong


We love pork at Dragon Knuckle. It's cheap, plays well with other flavors and is forgiving to cook. So what's better than pork stuffed with good stuff?

We decided to give it a try. Now, I'm not a butcher so the idea of turning a round piece of meat into a neat rectangle was intimidating. Mess it up and there's no going back. You're making kebabs now.

What cut to use? A loin is best because it's such a uniform tube of meat. A sirloin roast works nice too although it's less regular in shape and will contain more inner fat and connective tissue.

If using a loin, cut it into thirds. The larger, smoother end is the center loin. Use that part and save the rest for other applications.


Get a long knife and make sure it's sharp. Put your pork on a steady cutting board. (I put a damp paper towel underneath and the board won't slide. Guy Fieri learned this trick from someone who learned it from me, maybe.)

Start fat-side down. Make one clean slice not quite all the way through and roll the pork away. Take your time. Keep slicing and rolling. Try to keep the thickness uniform. Before long you'll have turned a cylinder into a rectangle.

Here's a piece of sirloin roast I opened up:

You'll get better with practice. What's the worst thing that can happen? You cut too deep and put a puncture in your neat rectangle. Slice it up and make a stir fry.

What Are We Stuffing It With?

The possibilities are endless. The biggest problem is that once you tie this tight and add heat, your filling may gush out. So consider that.

The same seasoning you'd put on the outside may be plenty. It won't melt and run. You'll get flavor inside and out. Use some fresh herbs too and failure will be harder to achieve.

But you know I tried to get fancy with this. When our garden was going nuts this summer, I made a pesto and halved some cherry tomatoes.

Naturally the tomatoes wanted to squirt out as soon as I applied some twine. Maybe pesto only would have been better.

Next time I blended some cream cheese with dried onion, dried garlic, chives and other seasonings. I grilled it for a while then finished it in the oven.

I'm glad I moved it to a pyrex dish because when the cheese melted, this happened:

Sure, it looks like my pork loin puked, but it tasted good. The cheese picked up some smoke from the fire and turned into a nice spread.

Oh yeah, you'll need some twine. Find a video on how to tie a butcher's knot. Don't squeeze too tight. You only need to keep it shut until you've seared the seem.

How To Cook It? 

I start on the grill or over the fire. Maybe I finish in the oven. I can't tell you how long to cook it. It really depends on the thickness of your roll.

So how to do it right? Use a sharp knife and cut with patience. Stuff it with dry ingredients and tie gently.

How to do it wrong? Think that being a butcher is easy, maul your meat and/or lose a finger. Stuff it with something doomed to melt and ooze into the fire, breaking your heart. Strangle the meat with twine like you were securing a prisoner.

Have fun with it. You'll get better every time. Please share your results. I'm sure you're better at this than me.

Keep it slow and low. - Dragon Knuckle


PS - Ooh, I need to use some dried tomatoes and mushrooms next time.

Tuesday, August 22, 2017

Our Amazon Store is Live


Greetings, Legion of Dragon Knuckle.

Big news. Amazon has allowed us to create a store page for our Dragon Knuckle brand. We put together our best pictures and videos. It went live today.

Check it out.

We know the best way to convince people that our gloves are the best is to just reach into the fire. Yet Amazon does not allow most retailers to use anything other than images and text on their product pages. We're so glad to be able to grab handfuls of coals and show our audience.


So remember: the word is like butter so spread the word. Our fans are the best. We see so many happy Dragon Knuckle owners on Instagram cooking and hooking up their families and friends. Follow us as DragonKnuckle_Jana and DragonKnuckle_David.

Keep it up and thank you.

Thursday, June 29, 2017

More Pork Shoulder Tips from Woodrow


Just after we posted Woodrow's BBQ rub and sauce, he passed us some more cooking advice. Some is shoulder specific and some is about life in general. I considered adding it to the first post, but it has enough gold to stand on its own.

Remember to follow @bits.bytes.brews on Instagram.

Put this on your grill and smoke it:

Here are a few tips that have helped me or still do to this day.

- Don't EVER get discouraged. It may seem like all is lost; but never give up. The last thing you want to do (especially as a beginning Pit-master) is compare your cooks to that of the folks you see on TV or in competitions you go to. More than likely they have many years of experience under their belts... But don't fret! With perseverance you can get there!

- THE STALL IS REAL! Don't let that dumb hunk of meat let you believe that it's done when it stays at 160 degrees for an hour or so and doesn't move. Kinda like how an athlete sweats to cool him or herself off; the meat does the same thing. As it cooks, it sweats and as it sweats, it cools (not so much as dropping temp, but as not climbing any higher. Just keep your pit at a steady temp and wait till it hits that magic 203 degrees.

- Branching off on the last tip. BE PATIENT! Good 'Que can't be rushed... They call it 'Low and Slow' for a reason.

- If you're going to inject your Pork Shoulder; be careful on what you use. If you go to say a major chain store and buy your meat there - more than likely it's going to me injected with a salt solution already. If that's the case inject it with 4 parts apple juice, 2 parts apple cider vinegar, and one part whiskey (You need to try it. Whiskey adds such an outstanding flavor... especially when you smoke with maple or oak).

If you got your shoulder from a reputable butcher; add a cup or so of kosher salt to the injection.

- Always be willing to learn. If you find that a good cook is going to give you advice, take it. Even if you already know the stuff.

-Have your family take part. Barbecuing is more than just cooking stuff to eat... It's a time of bonding, friendship, and just plain fun.

- Lastly, never 'Que without a good beer!

I've never thought about THE STALL before, but now I feel I'll see it everywhere. I've also never thought about my pork shoulder as an athlete, but the image fits. As for injecting, I've not tried that trick but I will.

(No, Sweetie. The whiskey is for the pork.)

Tuesday, June 27, 2017

Pork Shoulder Rub and Sauce by Bits.Bytes.Brews


Instagram has become our office space. Without guilt, Jana and I both spend much time and energy exchanging pictures, ideas and sentiments with people around the world as @dragonknuckle_jana and @dragonknuckle_david. We've become those dorks who can't eat without posting it first.

Don't be disappointed. We're building a brand. If we weren't truly artistic spirits who love people and food, we'd be fake.

One of the more interesting cats I've run into is @bits.bytes.brews. He asked me about our gloves and we got to talking about pork shoulders. It's Pork Shoulder Month. I've been asking everyone for their shoulder technique.

So Woodrow (that's his government name) sent me some background along with his recipe for pork rub and barbecue sauce.

How universal is barbecue? Woodrow builds competition-speed computers that run zillions of computations per second, then goes home to cook slow and low. Don't think your PC guru doesn't know his way around the smoker, too.

Here's a little piece of him:

My passion for BBQ started many years ago. In a small town called Charlestown (in the small state of Rhode Island). I was very young, maybe nine years old when I really started watching my Dad work his magic on the ‘Que. In all honesty – it was very rare that my Father wasn’t barbecuing something. Mind you, his pit was nothing spectacular – but he made it work. From burgers to wings, ribs to chops – he did it all and I fell in love…

Fast forward a couple decades – I found a cheap offset smoker at a local department store and figured; why not? I’m married and have a beautiful daughter with one on the way. Why not start doing something that I loved when I was a small boy? Well… This purchase ignited something big. I barbecued nearly every single day until my cheap offset just wasn’t doing it anymore. My wife and I hopped in the truck, drove 2 hours to a small town in New Hampshire and picked up my current pit – A Yoder Loaded Wichita.


Barbecue is an amazing thing. It builds attention to detail, teamwork and brings people closer together when it’s time to finally reap the rewards you worked so hard on. If it wasn’t for my father, my long days of trial and error and for my wife for helping me get what has become an essential part of family gatherings – my life in barbecue wouldn’t be where it is today.

Pork Rub
The base of my pork rub (mainly for my pulled pork) is roughly a 50/50 blend of kosher salt and table grind black pepper. I truly recommend pre-ground pepper due to the fact that it’s a bit lighter in the bite, but still has a great flavor.

For a 8-10lb shoulder
1 Cup Kosher salt
1 Cup table grind black pepper
3 Tablespoons of paprika
3 Tablespoons garlic powder
1 Tablespoon onion powder
1 Teaspoon Cayenne pepper

When applying the rub; use a shaker with large holes and let your wrists do the work. Salt is MUCH heavier than the rest and tends to settle.


Wood’s Killer ‘Que
¾ Cup finely chopped onion
1-2 Habanero Peppers, seeds removed (Or Jalapeno if you’d like it less spicy)
½ teaspoon of Ghost Chili powder (If you’re feeling brave)
2-3 Cloves of garlic, finely chopped
2 teaspoons of extra virgin olive oil
32oz of natural ketchup (homemade is the best!)
1 Cup of apple cider vinegar
1 Cup of brown sugar (I prefer the light stuff)
¼ Cup of agave nectar (or honey if you’d prefer)
1 tablespoon plus 1 teaspoon of Worcestershire
1 teaspoon of cumin
¼ cup of Brisket or Pulled Pork drippings

Combine all of the ingredients in a saucepan and heat until nearly bubbling. Use immediately or let it cool and store for up to 5 days.


When it comes to cooking, everyone's machine is different. You know your smoker. Cook without hurry and you'll be fine. Pork shoulders are forgiving.

Next time, give Woodrow's sauce and rub a try. I find it unique that his rub has no sugar in it. For mine, turbinado sugar is the #1 ingredient.

The more you share with people, the more you learn. That's your barbecue lesson for the day.

And when it comes to pulling apart that shoulder, we suggest our own claws. Not just because we sell them. We tried multiple variations and found this aggressive curve dug in best and caused less hand fatigue. They're tough and clean up well. That's why we chose this design:


Pulled Pork Month barrels on. Currently I have a shoulder in my Three Shadows brine. I'll be cooking it overnight on Wednesday. Stay tuned.

Until then, keep it slow and low.

Tuesday, June 13, 2017

The Brahestad Butt by Arctic BBQ

Image via ArcticBBQ.com

Perhaps "butt" is a funny word in Finland, but I don't get it.

Johannes at Arctic BBQ begins his post on pulled pork by stopping everyone's giggles. He explains that "butt" refers to barrel, as in the barrels used to transport pork shoulders and hams during the American revolutionary war.

I'd read that the term came from Old English, meaning "the widest part." My widest parts are my shoulders (for now) unless you count the distance between my self image and reality, which is spacious.

In classic Arctic BBQ style, Johannes takes a thoughtful, controlled approach to his 4.5 pound shoulder. He removed it from the fridge 2 hours ahead of time. He seasoned it with 7 tablespoons of rub composed of black pepper, paprika, onion, thyme, ginger, lemon and 23% smoked salt (he probably counted the grains).

He built a briquette snake and added some apple wood then monitored the whole affair with his iGrill2 iPad app.

His temp was 192ºF after 6 1/2 hours then he let it rest for an hour. That's faster than I do it. It's always enlightening to see another's take on a classic meal.

He used a couple of other tricks and techniques. What was he spraying it with in the picture above? Read his complete pulled pork study here and tease him about his non-Dragon Knuckle claws in the comments.

Image via ArcticBBQ.com

Saturday, June 10, 2017

Chef Martin Lopez's Carnitas de Michoacán


When I was sixteen, I needed a job. I went through the classified ads and found a gig bussing tables at a Mexican Bar and Grill.

My life changed forever.

Not only did I realize there was good money to be made earning tips in the restaurant business, but I got to be around different people all the time. I listened to them, talked with them, watched them interact, saw how they ate, observed how they ordered and picked up on the many fascinating details of being human.

And I fell in love with Mexican flavors. Cilantro, chilis, lime, cumin, avocado, pollo borracho, carne asada, tequila and anything wrapped in a tortilla are close to my otherwise suburban gringo heart.

So for Pork Shoulder Month, I had to think about Carnitas. I was so glad Chef Martin Lopez shared his recipe with us.


Chef Martin grew up in Mexico City in a large family run by his hardworking, dedicated Mother. At the age of seven he was already a big part of feeding the family. He earned a degree in Tourism and Languages in Mexico City in 1988 then went back to school for a degree in the Culinary Arts. He has travelled all around Europe and South America, adding multicultural elements to his style that he calls Mexican Novelle.

He is a professional chef, food writer, blogger and culinary ambassador for the Hispanic and Latin community.

Here's his version of the classic Carnitas recipe:


There is nothing better than to take a walk around the plazas in Mexico for lunch or dinner and smell the amazing aromas coming from all the food vendors.

One dish that you will see almost in every corner is the amazing Pork Carnitas. This delicate tender meat is used to fill tacos, and every one claims they have “the best secret recipe” as these recipes and cooking methods are passed from generation to generation.

I am bringing you a small taste of Mexico with my version on how to make slow-simmered pork, with a quick fry at the end. Carnitas!

Carnitas are easy to make, but do take some time so plan accordingly. They are the perfect dish for a family event as you can have it ready and let your guests assemble their own tacos.

So have a big fiesta and serve Carnitas!

Your friends will remember them for years to come!

INGREDIENTS:

Half a white onion peeled and coarsely chopped

1 1/2 cups water

6 cloves garlic

1 teaspoon dried marjoram

1 teaspoon dried thyme

1 teaspoon freshly ground black pepper

1 stick of Mexican cinnamon

4 whole cloves stems removed

1 tablespoon kosher or coarse sea salt or to taste

1 cup of pork lard

4 to 5 pounds boneless pork shoulder or butt cut into 4-inch chunks, fat on

1/2 teaspoon kosher or coarse sea salt

2 bay leaves

1 cup freshly squeezed orange juice and half of a whole orange

½ cup of sweetened condensed milk

DIRECTIONS:

Place the water, onion, garlic cloves, marjoram, thyme, black pepper, cinnamon, stemmed whole cloves and 1 tablespoon salt in a blender and puree until smooth.

Set a large Dutch oven or heavy casserole over medium-high heat. Add the lard and once it has heated up, add the pork chunks and sprinkle in 1/2 teaspoon of salt. Brown the meat on all sides, stirring and flipping as each side browns, about 10 minutes.

Pour the onion mixture over the meat, let it come to a simmer and cook for 5 to 6 minutes. Pour in the orange juice, the half orange and sweetened condensed milk, add the 2 bay leaves, and give it a good stir. Let it come to a simmer, then reduce heat to medium-low to low and cover. Cook covered, stirring and scraping the bottom of the casserole a couple times and until the meat is completely cooked and coming easily apart if you pull one piece, about one hour and a half. Remove the lid, cook for another 4 to 5 minutes on high heat to give the meat a fast high heat fry.

Turn off the heat and let it cool down, scoop out the Carnitas with a slotted spoon, leaving any fat behind, and serve the meat in a bowl or platter. Shred with a fork, if desired, before tucking into tacos. Serve with warm corn tortillas and chopped cilantro, fresh onion, pickled jalapeños, carrots, guacamole, Pico de Gallo and salsas on the side.

Enjoy!

Humongous thanks to Chef Martin and John Schell for sharing this. I'll put this together for my family soon.

Sunday, June 4, 2017

Happy Pork Shoulder Month


I just started messing around with pork shoulder. It has rapidly become one of my favorite cuts of meat. It's very versatile, takes other flavors well and is very forgiving.

All you need is prep and patience. You can't cook it fast, so plan ahead, hence my Saturday Night Shoulder technique.

Around the world, from Carnitas to Kahlua Pig to classic American Pulled Pork, everyone has their own way of cooking the shoulder.

So I said to myself: "Self, let's feature the pork shoulder for a month. Maybe next month we'll do something different."

So I'm reaching out to you and other great cooks I know for your favorite pork shoulder recipes and techniques. There are no wrong answers here. Please share with me at David at Dragon Knuckle dot com and I will post it here.

Let's Get to Know the Cut


You might not be a real butcher, so let's look at the pig part we're talking about.

Image via Shop Latin Touch
You can get it with or without the skin. You can get it bone-in or boneless.

Image via Flickr by Key West Wedding Photography
Image via WorldTradeDB
I've only worked with the bone-in skinless variety. I like the square shape and nice fat cap. It's tough to dry out but requires a along patient cooking time.

This is the Pork Shoulder Month into. I will soon be sharing my own style of making pulled pork. I have a fantastic Carnitas recipe from a well known chef. I will also bring the Hawaiian take on the pork shoulder.

What else can we do? It's a big porky world out there. Give me what you got.

Thursday, May 18, 2017

Knuckling Up at the Pomona SoCal BBQ Bash


The Rub Life BBQ Team is going to battle in Pomona this weekend with Dragon Knuckle Gloves on their fists.

Yeah, that sounds a bit dramatic. It's not about the gloves. It's about heart, stomach, palate and skill. But there will be gloves and our logo on their banner, for which we are flattered and grateful.


This Saturday at the Pomona Fairplex from 11am to 6pm, it's going down. Lots of barbecue with games for the little kids, beer for the big kids and music for everyone.

Competing together in the Amateur category will be Fern's Semi-Famous BBQ, Krillyz Backyard BBQ and Sycamore Street BBQ. Smoking Ray's Backyard BBQ will be competing on his own. 7 Sins BBQ will be competing in the Professional category.


The Amateurs will be cooking chicken and ribs. The Professionals will be doing chicken, ribs, pork butt and brisket.

Here we are over a thousand miles north missing out on the whole thing. While not fit to compete, we are certainly prepared to eat and have fun. Too bad. We need a road trip.

Get your tickets here if you'll be in Southern California this weekend.

Friday, May 12, 2017

What Kind of Fool Grills a Banana?


Grillin' Fools grill bananas. That's who.

Scott Thomas, who is leader of the Grillin' Fools team along with his father Greg and Tom Jones, notes that no one ever grills breakfast or dessert.

I'll start, man. I promise, especially after seeing this Grilled Banana Split recipe.


Image via GrillinFools.com
Who are the Grillin' Fools?
Scott, Greg and Tom are active and passionate outdoor cookers based around St. Louis. They are dedicated to sharing their mistakes and triumphs in order to teach others. They don't cater, will never own a restaurant and they don't cook competitively.

They do host an annual Charity BBQ Competition, however, and can be talked into doing Grilling Classes.

Scott loves cooking together with his dad, but admits "we never cooked anything together until I started the website. I never cooked with him as a kid. He manned the grill and I watched. The running joke is I was sent to college with a suitcase and a grill. While we didn't cook much when I was young, we cook all the time together now and it's really special to have my dad around and doing this as a business together. Most people get those, 'pinch me, am I dreaming,' moments a few times in their lives. I get them dozens of times a year being able to cook with dad so often as well as the other BBQ related events we are able to do together."

Catch Scott cooking Bacon Pineapple Ribs with his Dragon Knuckle Gloves:


The way Grillin' Fools does recipes is unique and very detailed. In a narrative tone, they describe each step including products used and mistakes along the way. Then they finish with a printable recipe card you can easily save and store.


The Banana Split recipe caught my attention because it reminded me or a Brûléed Banana dessert I once served at a restaurant. That dish used a torch to caramelize sugar on bananas. Then came vanilla ice cream, berries, chocolate syrup and whipped cream.

Scott's take on this dish adds smoky flavor from the grill and that little kick of spice. Sweet and hot always go well together.


Image via GrillinFools.com
Lots of fruit goes nice on the grill. Peaches, apples, strawberries or anything firm enough to stay together. Just make sure the grill's not too hot and don't take your eye off it. Things can go wrong in a hurry.


Next time you step to the grill, try this one: Cut a pineapple into 1" rings. Cut off the peel and the core. Sprinkle it with sugar and put it on the grill until both sides are charred a bit. Then stick that on a plate and put a scoop of vanilla right in the hole in the middle. Berries, syrup and whipped cream couldn't hurt here.
Get out there and get foolish. Grill new stuff and don't be afraid to make mistakes. Find Grillin' Fools on Instagram and learn something.